Having issues with your LAN settings in Windows 10? This guide will help you disable the "Automatically Detect Settings" option to ensure your network configuration remains stable and consistent.
If you ever change your mind, feel free to change your Adapter Settings to automatically detect LAN and proxy settings:
By following these detailed solutions, you can effectively manage and disable the "Automatically detect settings" option, ensuring a stable and consistent network experience.
How to Disable "Automatically Detect Settings" in Windows 10?
1. Reapply Group Policy Settings
- Open Command Prompt: Click the Start menu, type "cmd" into the search bar, and press Enter.
- Run GPUPDATE: In the Command Prompt window, type gpupdate /force and press Enter.
- Wait for the Process to Complete: The system will apply the group policy updates. This action should reset any settings that were modified.
2. Modify MigrateProxy Registry Key
- Open the Registry Editor:
- Press Win + R to open the Run dialog.
- Type regedit and press Enter.
- Navigate to the Registry Path: Go to HKEY_CURRENT_USER\Software\Microsoft\Windows\CurrentVersion\Internet Settings.
- Modify the MigrateProxy Key:
- Find the MigrateProxy key and double-click it.
- Change its value from 0 to 1.
- Close the Registry Editor: Save the changes by clicking OK and close the Registry Editor.
3. Disable "Automatically Detect Settings" via Internet Options
- Open Internet Options:
- Press Win + R to open the Run dialog.
- Type inetcpl.cpl and press Enter.
- Go to LAN Settings:
- In the Internet Properties window, go to the Connections tab.
- Click on the LAN settings button.
- Uncheck "Automatically Detect Settings": In the Local Area Network (LAN) Settings window, uncheck the Automatically detect settings checkbox.
- Save and Close: Click OK to save your changes and close all windows.
4. Utilize Windows 10 VPN Settings
- Open VPN Settings:
- Click on the Start menu and select Settings (gear icon).
- Go to Network & Internet.
- Select VPN from the left pane.
- Modify VPN Proxy Settings:
- Find your VPN connection and click on it.
- Click on Advanced options.
- Scroll down to the Proxy settings section.
- Set to Manual:
- Change the Proxy settings to Manual.
- Ensure that Automatically detect settings is turned off.
- Save Changes: Click Save to apply the new settings.
5. Use Control Panel to Adjust Proxy Settings
- Open Control Panel:
- Press Win + R to open the Run dialog.
- Type control and press Enter.
- Navigate to Internet Options:
- In the Control Panel, go to Network and Internet.
- Click on Internet Options.
- Adjust LAN Settings:
- Go to the Connections tab and click on LAN settings.
- Uncheck the Automatically detect settings box.
- Save and Exit: Click OK to save the changes and close all windows.
6. Command-Line Options for Proxy Settings (Windows)
- Open Command Prompt as Administrator:
- Click the Start menu, type "cmd", right-click on Command Prompt, and select Run as administrator.
- Disable Proxy:
- To disable the proxy server, type netsh winhttp reset proxy and press Enter.
- Enable Proxy (Optional):
- To enable a proxy server, type netsh winhttp set proxy <proxy-server-address>:<port> and press Enter.
- Verify Changes: Type netsh winhttp show proxy to see the current proxy settings.
7. Set Proxy Settings in Microsoft Edge
- Open Microsoft Edge: Launch the Edge browser.
- Access Proxy Settings:
- Click on the three dots in the upper-right corner to open the menu.
- Select Settings, then click on System and Performance.
- Click on Open your computer's proxy settings.
- Adjust Settings:
- Choose between Automatic or Manual proxy setup.
- Ensure Automatically detect settings is turned off if configuring manually.
- Save and Exit: Click Save to apply the settings.
If you ever change your mind, feel free to change your Adapter Settings to automatically detect LAN and proxy settings:
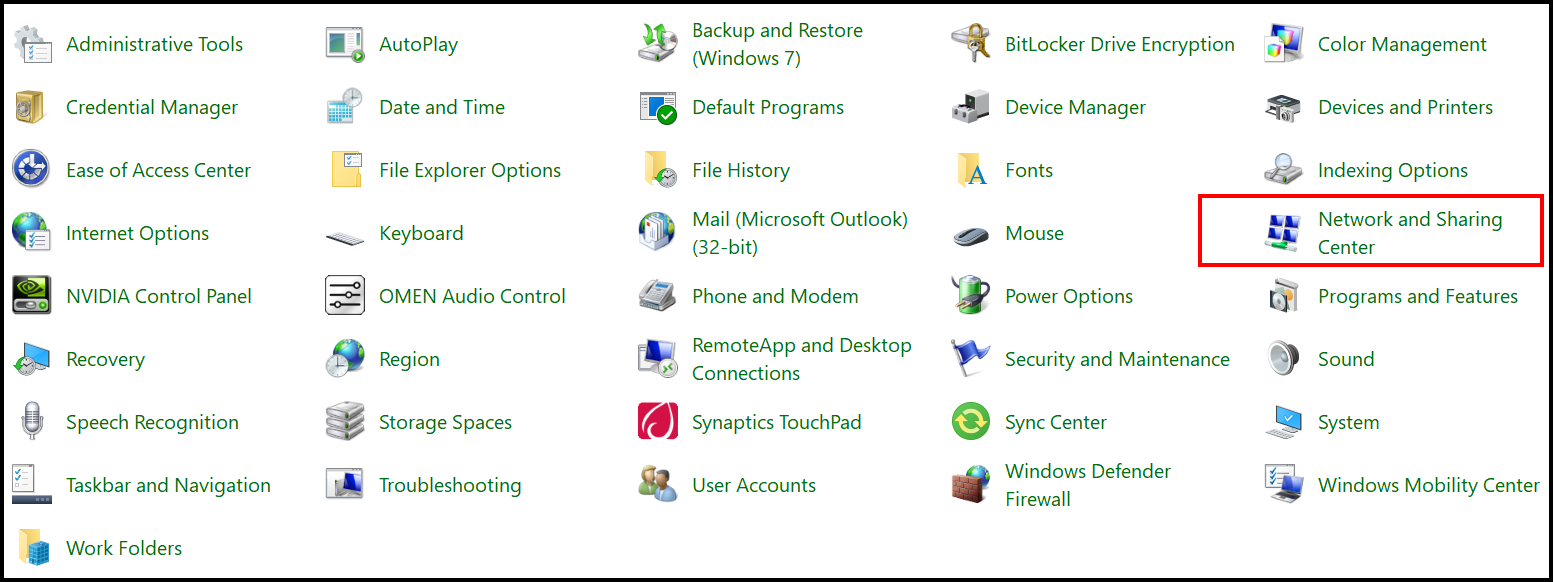
- Click the Start button, type control panel, and click on it from the results.
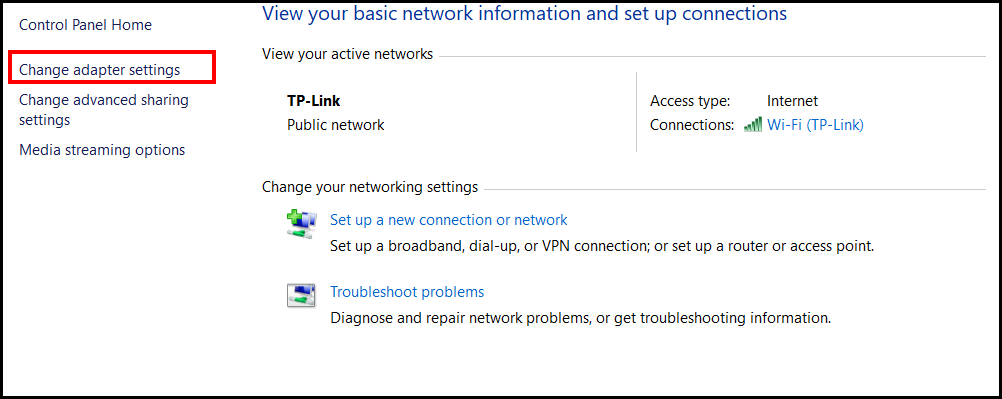
- Go to Network and Sharing Center.

- On the left menu, choose Change Adapter Settings.

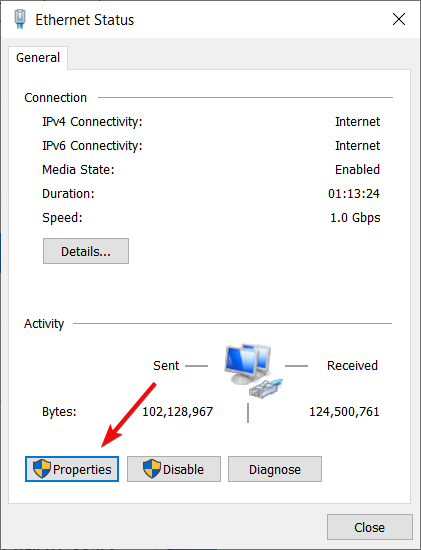
- Double-click to open your Ethernet connection and click Properties.

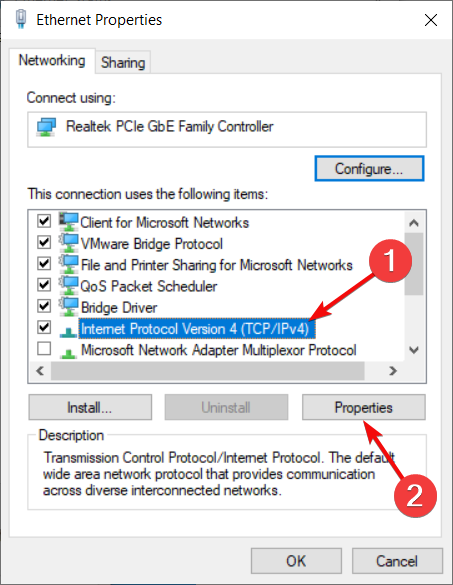
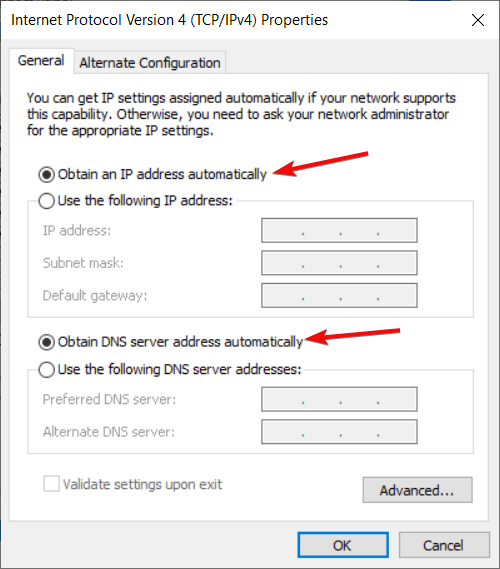
- Select Internet Protocol 4 TCP IPv4 and click Properties again.

- Enable automatic detection for both IP and DNS addresses.

By following these detailed solutions, you can effectively manage and disable the "Automatically detect settings" option, ensuring a stable and consistent network experience.