Setting up Miracast on your Windows 10 device can help you wirelessly project your screen to a TV, projector, or another display device. Here’s how to get started and troubleshoot common issues.
By following these detailed steps, you should be able to set up and effectively use Miracast on Windows 10. Use the detailed solutions provided to troubleshoot any issues as they arise.
How to Set Up and Use Miracast on Windows 10?
1. Enable Miracast on Windows 10
Step-by-Step Guide
- Turn on the Display Device:
- Turn on your TV, projector, or other display device.
- If your display doesn't support Miracast natively, plug a Miracast adapter (such as the Microsoft Wireless Display Adapter) into the HDMI port of your display.
- Check Miracast Support on Your PC:
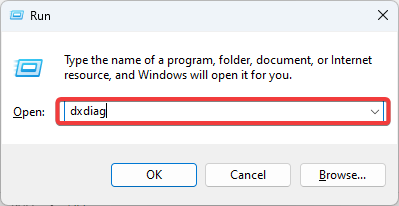
- Press the Windows + R keys on your keyboard to open the Run dialog, then type dxdiag and hit Enter.

- After the tool collects all the information about your computer, click the Save all Information button.

- Now you have to choose where you want to save the DxDiag.txt file on your computer. Make sure to choose a quick-to-access location.

- Open the DxDiag.txt file, which is usually in notepad format.
- Then, scroll toward the bottom of the report, where you will find the status of the Miracast on your PC.
- It will either read Miracast is available, in which case your PC will be ready to cast its display to a compatible device, or read Miracast not supported, which you might want to explore other options. If you see Miracast: available with HDCP, everything works correctly.

- Press the Windows + R keys on your keyboard to open the Run dialog, then type dxdiag and hit Enter.
- Enable Wi-Fi:
- Ensure that Wi-Fi is enabled on both your PC and the display device. Both devices must be connected to the same Wi-Fi network.
- Open Settings on your PC:
- Press Win + I to open the Settings window.
- Go to Devices > Bluetooth & other devices.
- Click Add Bluetooth or other device.
- Select Wireless display or dock.
- Connect to the Display Device:
- Your PC will now search for available Miracast devices.
- Select your display device from the list of available devices.

2. Projecting to this PC
Step-by-Step Guide
- Add the Wireless Display Feature:
- Open Start > Settings > System > Projecting to this PC.
- Under Add the “Wireless Display” optional feature to project to this PC, select Optional features.
- Next to Add an optional feature, select View features, then enter “wireless display”.
- Select the checkbox next to Wireless Display from the list of results, select Next, then select Install.
- Launch the Wireless Display App:
- On the PC you’re projecting to, type "wireless display" in the search box on the taskbar and select Wireless Display in the list of results.
- Connect from the Projecting PC:
- On the PC you’re projecting from, press Windows logo key + K and select the PC you’d like to connect to.
- Alternatively, you can search for Cast in the Windows Search bar, then select Connect to a wireless display.
- Manage Projection Preferences:
- Open Start > Settings > System > Projecting to this PC on the PC you’re projecting to.
- Manage your projection preferences from this page in Settings.
3. Troubleshooting Miracast Issues
Step-by-Step Guide
- Update Device Drivers:
- Your Miracast connection issues might be due to outdated device drivers. To update, go to the Device Manager.
- Find your Wi-Fi and display drivers, right-click, and select Update driver.
- Ensure Wi-Fi is Enabled:
- Press Win + R, type ms-settings:network-wifi, and press Enter.
- Make sure Wi-Fi is enabled on your PC and that both devices are on the same Wi-Fi network.
- Restart Devices:
- Sometimes, a simple restart can solve the issue. Restart both your PC and the display device.
- Check for Interference:
- Ensure that no obstructions are blocking the signal between the two devices.
- Move your router closer to both devices to minimize interference.
4. Miracast App Alternatives
If your device does not support Miracast natively, you might consider using third-party software like AirMyPC to achieve similar functionality. This software can help mirror your screen even when native support is unavailable.- Download and Install AirMyPC:
- Visit the AirMyPC website and download the application.
- Install the application on your PC following the on-screen instructions.
- Connect to Your Display:
- Open AirMyPC and follow the steps within the app to connect to your Miracast-enabled display device.
By following these detailed steps, you should be able to set up and effectively use Miracast on Windows 10. Use the detailed solutions provided to troubleshoot any issues as they arise.