Managing and configuring "Automatically Detect Settings" in browsers and Windows can help resolve connectivity issues caused by incorrect network configurations. Here’s how you can handle these settings effectively.
By following these detailed steps, users can effectively manage and configure browser and Windows proxy settings, ensuring a stable and secure browsing experience.
How to Manage and Configure "Automatically Detect Settings" in Browsers and Windows?
1. Change your Adapter Settings to automatically detect LAN and proxy settings
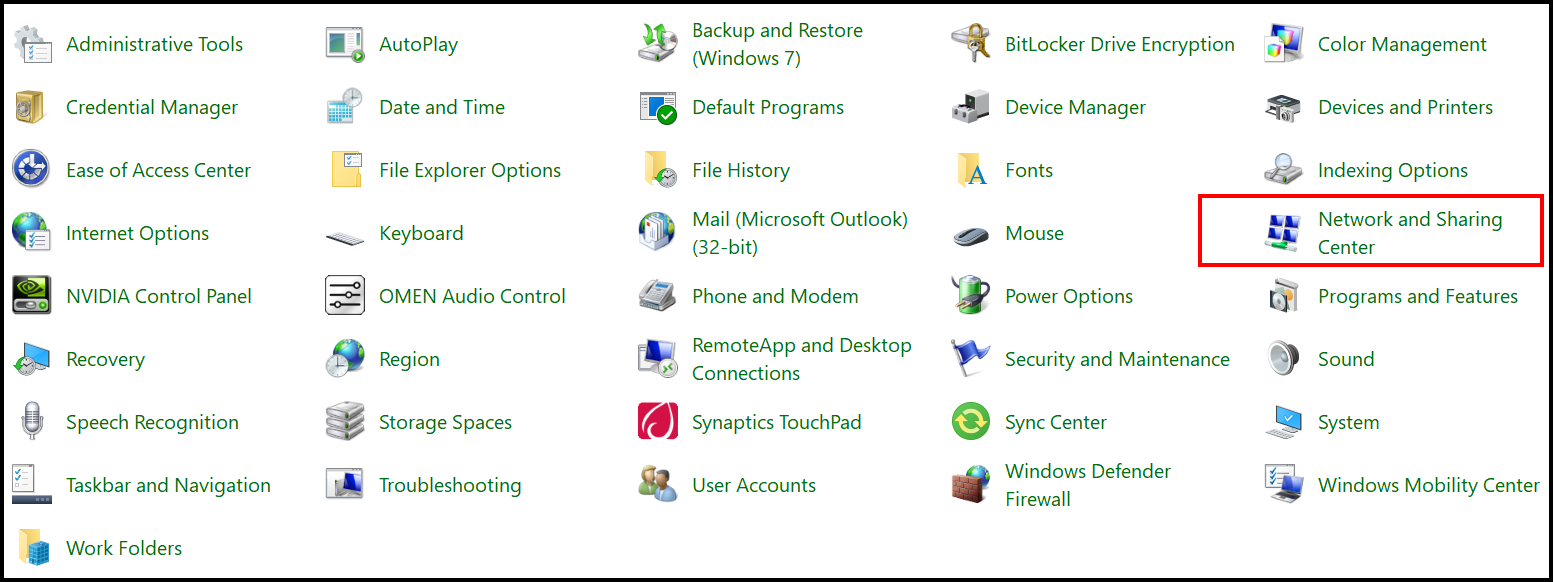
- Click the Start button, type control panel, and click on it from the results.
- Go to Network and Sharing Center.

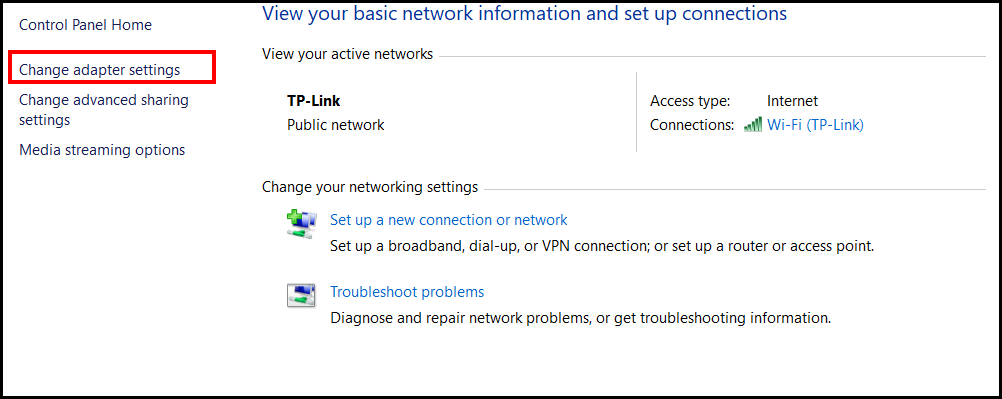
- On the left menu, choose Change Adapter Settings.

- Double-click to open your Ethernet connection and click Properties.
- Select Internet Protocol 4 TCP IPv4 and click Properties again.
- Enable automatic detection for both IP and DNS addresses.
2. Use Group Policy to Disable "Automatically Detect Settings"
- Open Group Policy Editor: Press Windows + R, type gpedit.msc, and press Enter.
- Navigate to Internet Explorer Settings: Go to Computer Configuration > Administrative Templates > Windows Components > Internet Explorer.
- Edit the Proxy Settings Policy: Find and double-click Disable changing proxy settings.
- Enable the Policy: Set the policy to Enabled and click OK.
- Update Group Policy: Open Command Prompt as an administrator and run gpupdate /force to apply the policy changes immediately.
3. Modify Registry to Prevent Auto-Detection on VPN
- Open Registry Editor: Press Windows + R, type regedit, and press Enter.
- Navigate to Proxy Settings: Go to HKEY_CURRENT_USER\Software\Microsoft\Windows\CurrentVersion\Internet Settings.
- Find MigrateProxy: Locate the MigrateProxy DWORD value.
- Modify the Value: Double-click MigrateProxy and change its value from 0 to 1.
- Add VPN-specific Settings: If needed, navigate to the specific VPN adapter settings under HKEY_LOCAL_MACHINE\SYSTEM\CurrentControlSet\Services\Tcpip\Parameters\Interfaces\ and set appropriate values.
4. Use Command Line to Configure Proxy Settings on Windows
- Open Command Prompt as Administrator: Right-click the Start button, and select Command Prompt (Admin).
- Enable Proxy Server: To enable, run:netsh winhttp set proxy <proxy-server-address>:<port>
- Disable Proxy Server: To disable, run:netsh winhttp reset proxy
- Verify Current Settings: To see current proxy settings, run:netsh winhttp show proxy
5. Configure Proxy Settings on Microsoft Edge
- Open Microsoft Edge: Click on the Start menu, type "Microsoft Edge," and open it.
- Access Settings: Click on the three horizontal dots in the top-right corner and select Settings.
- Open System Settings: Scroll down and click System and performance, then select Open your computer's proxy settings.
- Adjust Proxy Settings:
- For Automatic Setup:
- Turn on Automatically detect settings.
- Turn on Use setup script and enter the script address.
- Click Save.
- For Manual Setup:
- Turn on Use a proxy server.
- Enter the server address and port number.
- Add exceptions in the Do not use proxy server for addresses beginning with: field if needed.
- Click Save.
- For Automatic Setup:
6. Bypass Proxy for Specific Addresses in Internet Explorer
- Open Internet Explorer: Click on the Start menu, type "Internet Explorer," and open it.
- Access Internet Options: Click on the Tools menu (gear icon) in the top right corner and select Internet Options.
- Navigate to Connections Tab: In the Internet Options window, go to the Connections tab.
- Open LAN Settings: Click the LAN settings button in the bottom right.
- Configure Proxy Exceptions:
- Check Use a proxy server for your LAN.
- Click on the Advanced button.
- Enter the addresses you want to bypass the proxy for in the Do not use proxy server for addresses beginning with: box.
- Separate multiple addresses with semicolons.
- Click OK to save changes.
7. Troubleshoot VPN Connection Issues with Proxy Settings
- Open VPN Settings: Press Windows + I to open Settings, go to Network & Internet, and then click on VPN.
- Select VPN Connection: Click on the VPN connection you are having issues with.
- Open Advanced Settings: Click on Advanced options.
- Check Proxy Settings: Ensure that Automatically detect settings is set correctly for your VPN adapter.
- Save and Test: Apply changes and test the VPN connection to ensure it works without re-enabling the auto-detect settings.
By following these detailed steps, users can effectively manage and configure browser and Windows proxy settings, ensuring a stable and secure browsing experience.